Azure AI Custom Vision
Azure AI Custom Vision: Revolutionizing Image Analysis
Created Sep 11, 2024 - Last updated: Sep 11, 2024

Azure AI Custom Vision is a powerful image recognition service that allows you to build, deploy, and improve your own image identifier models. Whether you’re a developer or a business looking to integrate image recognition into your applications, Custom Vision offers a user-friendly and efficient solution.
What is Custom Vision?
Custom Vision is an image recognition service that applies labels to images based on their visual characteristics. Each label represents a classification or object. The service allows you to specify your own labels and train custom models to detect them. This flexibility makes it ideal for a wide range of applications, from identifying products in a retail setting to detecting defects in manufacturing.
Key Features
- Custom Models: With Custom Vision, you can create custom image identifier models using the latest technology from Azure. The service supports few-shot learning, allowing you to build models with a small amount of data.
- Image Classification and Object Detection: Custom Vision can classify entire images or detect objects within images, providing coordinates for where the labels are found.
- Optimized for Quick Prototyping: The service is designed to quickly recognize major differences between images, making it easy to start prototyping with as few as 50 images per label.
- Multiple Algorithms: You can choose from several variations of the Custom Vision algorithm, optimized for different types of images, such as landmarks or retail items.
How It Works
- Upload Images: Submit sets of images that do and don’t have the visual characteristics you’re looking for8. Label these images with your own tags.
- Train the Model: The machine learning algorithm analyzes the images and trains itself based on the provided labels. It calculates its accuracy by testing itself on the same images.
- Test and Retrain: Once trained, you can test your model, retrain it with new data, and improve its accuracy.
- Deploy and Use: Use the trained model in your image recognition app to classify images or detect objects. You can also export the model for offline use.
Getting Started — Classifier
You can use Custom Vision through a client library SDK, REST API, or the Custom Vision web portal. Follow the below steps to get started and explore the various features and capabilities of the service.
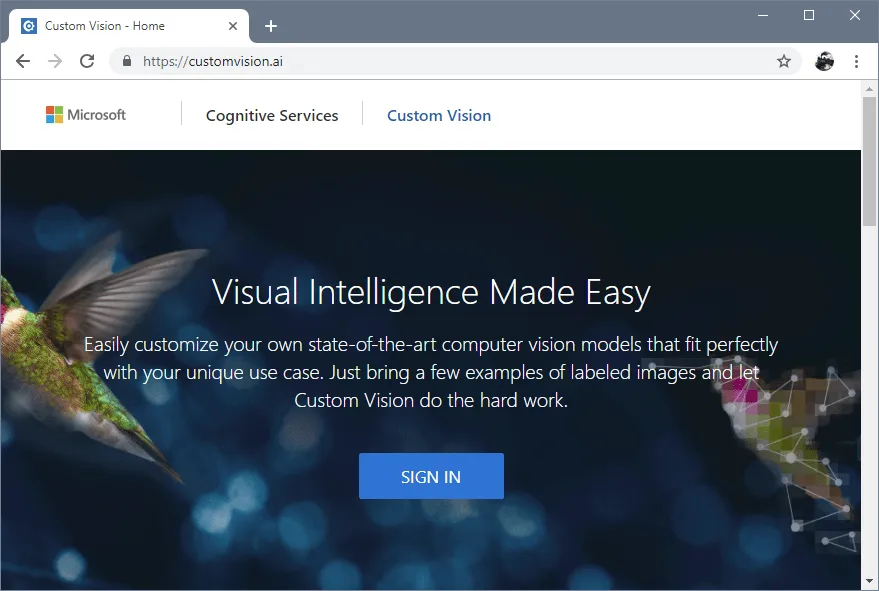
Sign In: Go to Custom Vision and sign in with your Microsoft account.
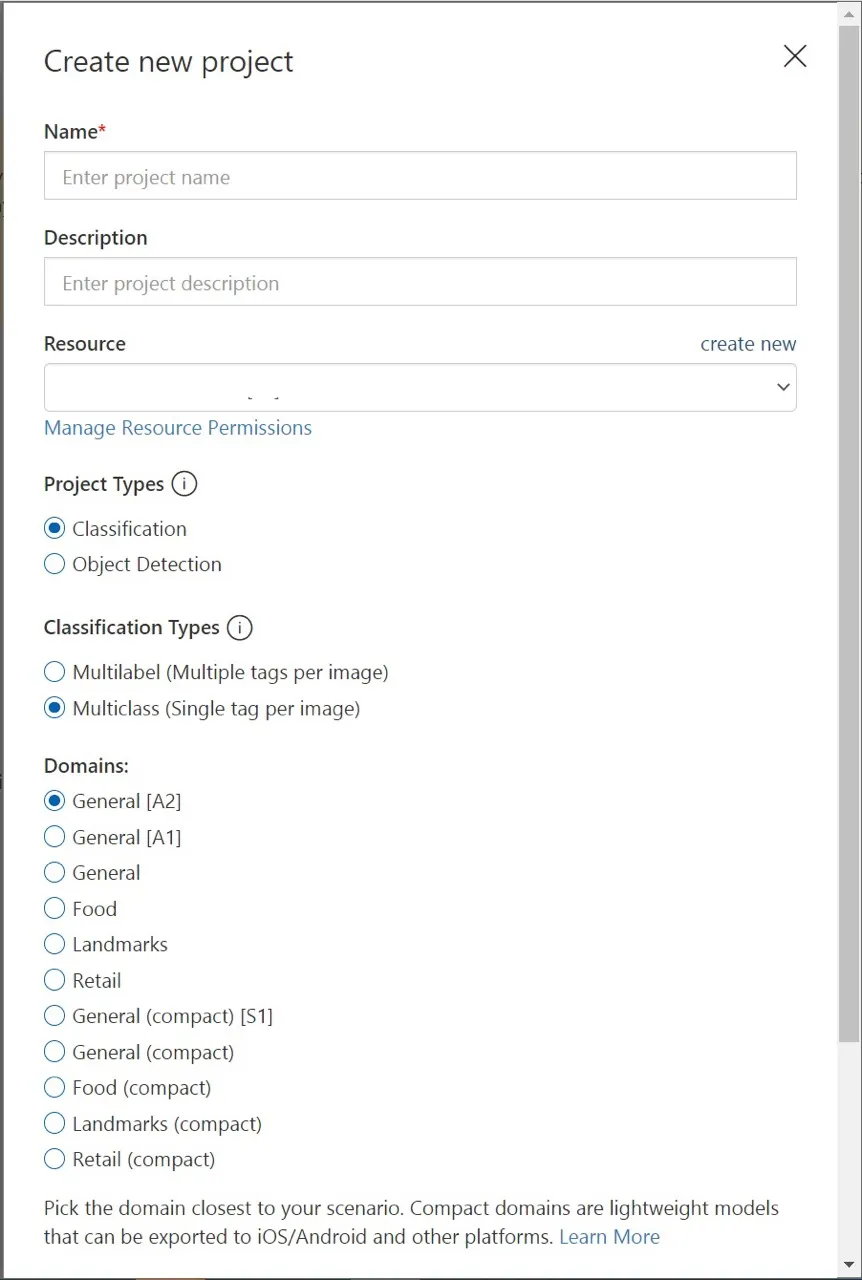
Create a New Project: Click on “New Project” and fill in the project details like name, description, and domain.
Add Images: Upload images for training your classifier. Ensure you have a minimum of 6 images per tag and at least 2 tags.
Train Your Model: Once images are uploaded, train your model by clicking on the “Train” button.
Test and Improve: Test your model with new images and retrain as necessary to improve accuracy.
Getting Started — Object Detector
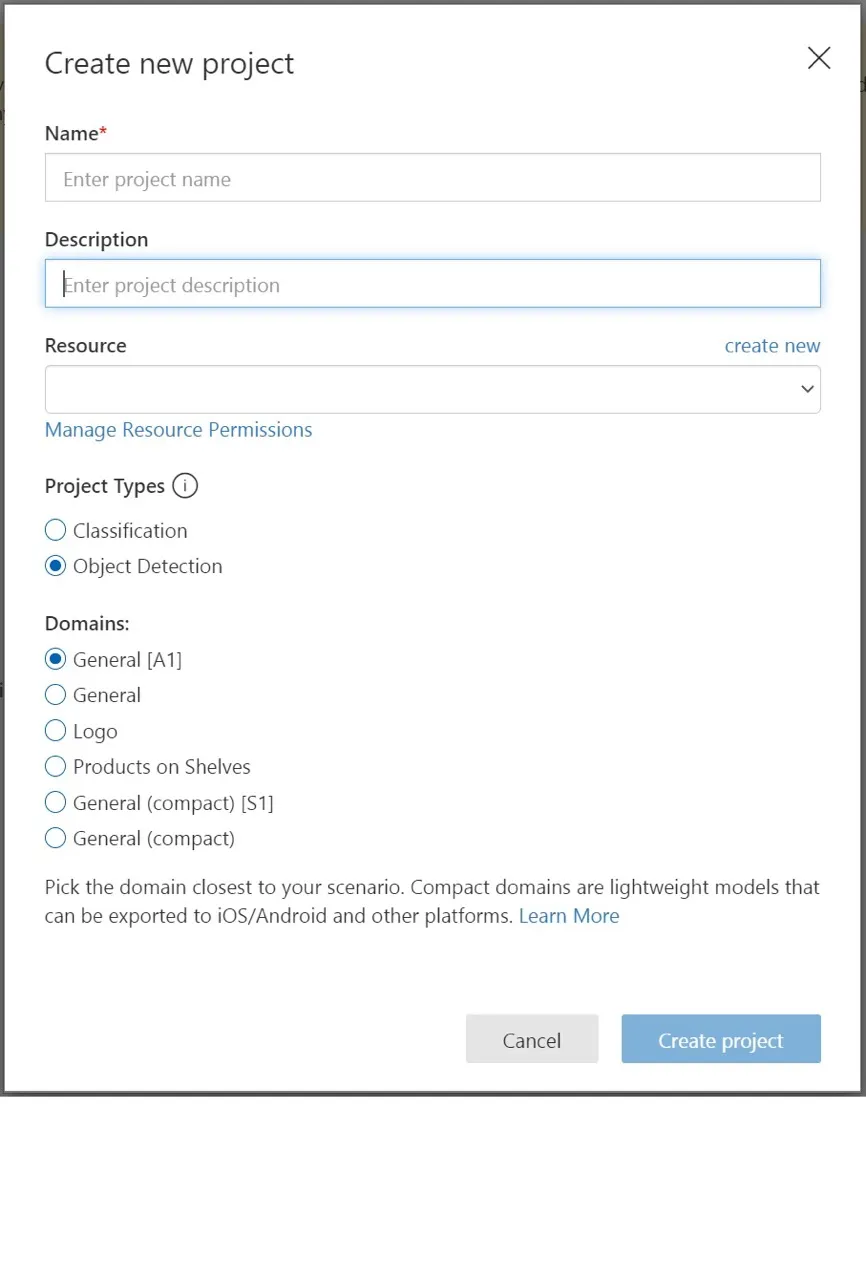
To create project for Object detector, select project type as Object Detection.
Choose training images
As a minimum, use at least 30 images per tag in the initial training set. Also want to collect a few extra images to test your model once it’s trained.
In order to train the model effectively, use images with visual variety. Select images that vary by:
- camera angle
- lighting
- background
- visual style
- individual/grouped subject(s)
- size
- type
Additionally, make sure all the training images meet the following criteria:
- .jpg, .png, .bmp, or .gif format
- no greater than 6MB in size (4MB for prediction images)
- no less than 256 pixels on the shortest edge; any images shorter than this will be automatically scaled up by the Custom Vision Service
Upload and tag images
In this section, you upload and manually tag images to help train the detector.
To add images, select Add images and then select Browse local files. Select Open to upload the images.
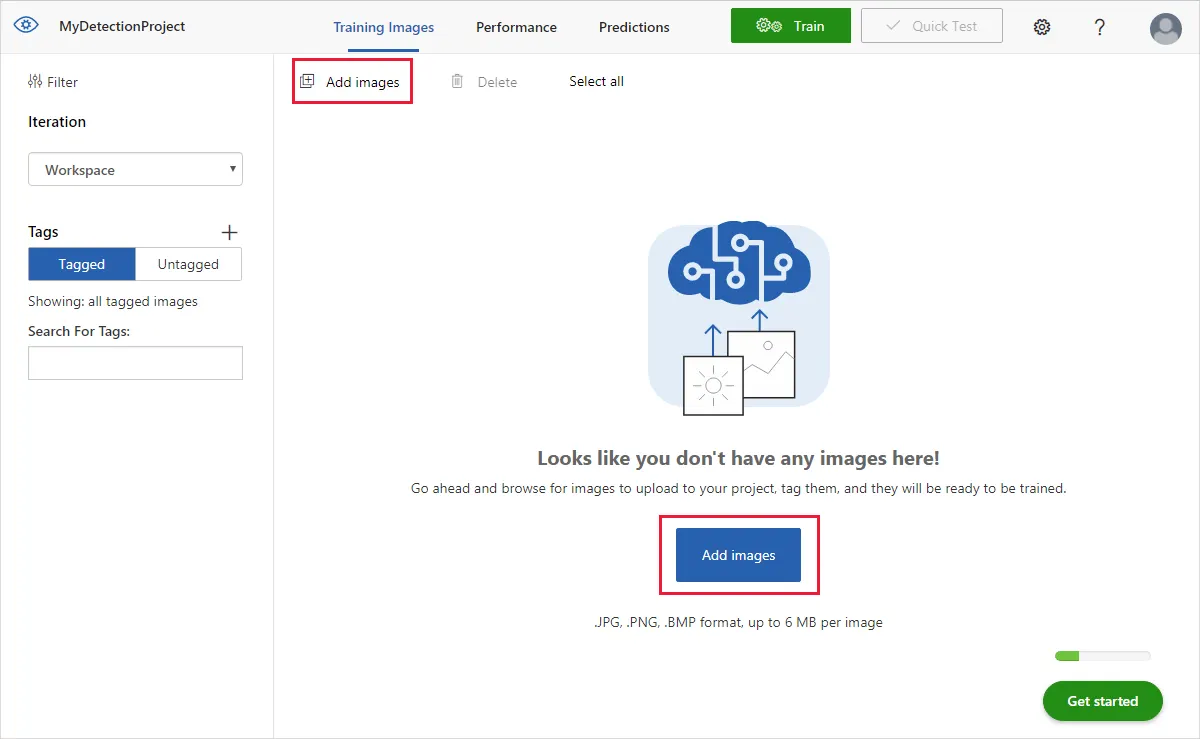
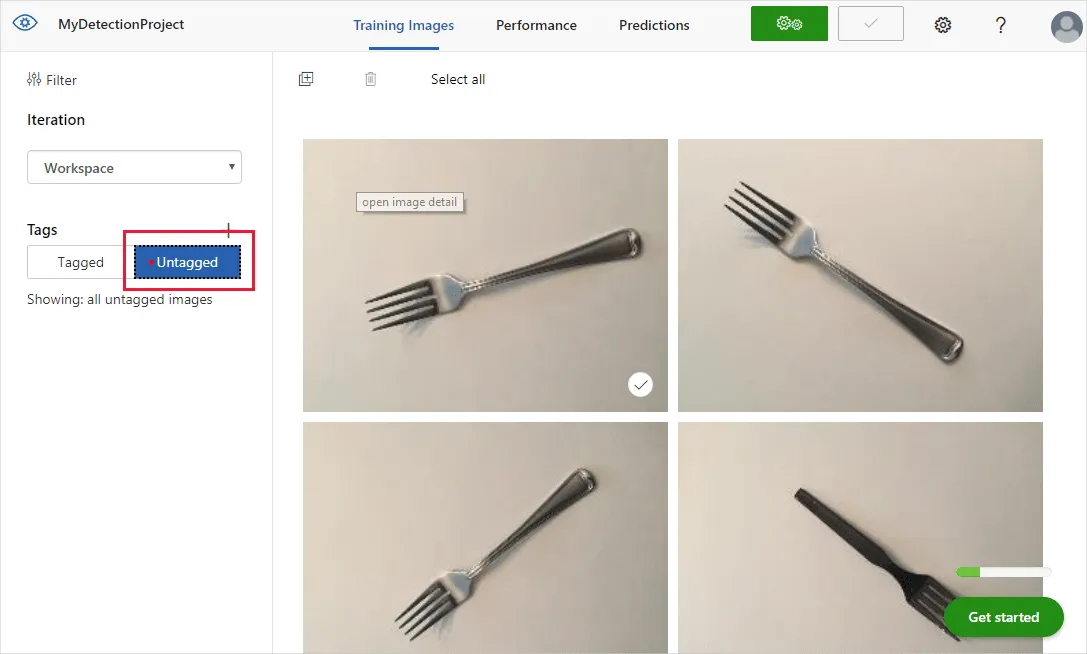
You’ll see your uploaded images in the Untagged section of the UI. The next step is to manually tag the objects that you want the detector to learn to recognize. Select the first image to open the tagging dialog window.
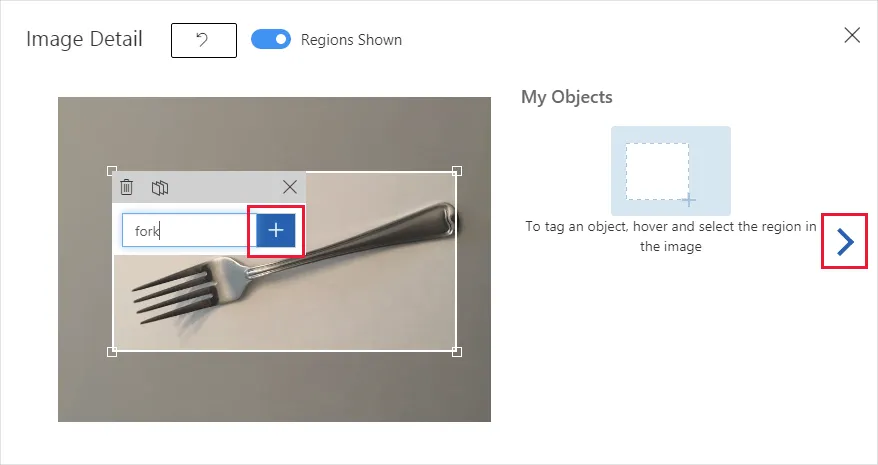
Select and drag a rectangle around the object in your image. Then, enter a new tag name with the + button, or select an existing tag from the drop-down list. It’s important to tag every instance of the object(s) you want to detect, because the detector uses the untagged background area as a negative example in training. When you’re done tagging, select the arrow on the right to save your tags and move on to the next image.
To upload another set of images, return to the top of this section and repeat the steps.
Train the detector
To train the detector model, select the Train button. The detector uses all of the current images and their tags to create a model that identifies each tagged object. This process can take several minutes.

The training process should only take a few minutes. During this time, information about the training process is displayed in the Performance tab.

Evaluate the detector
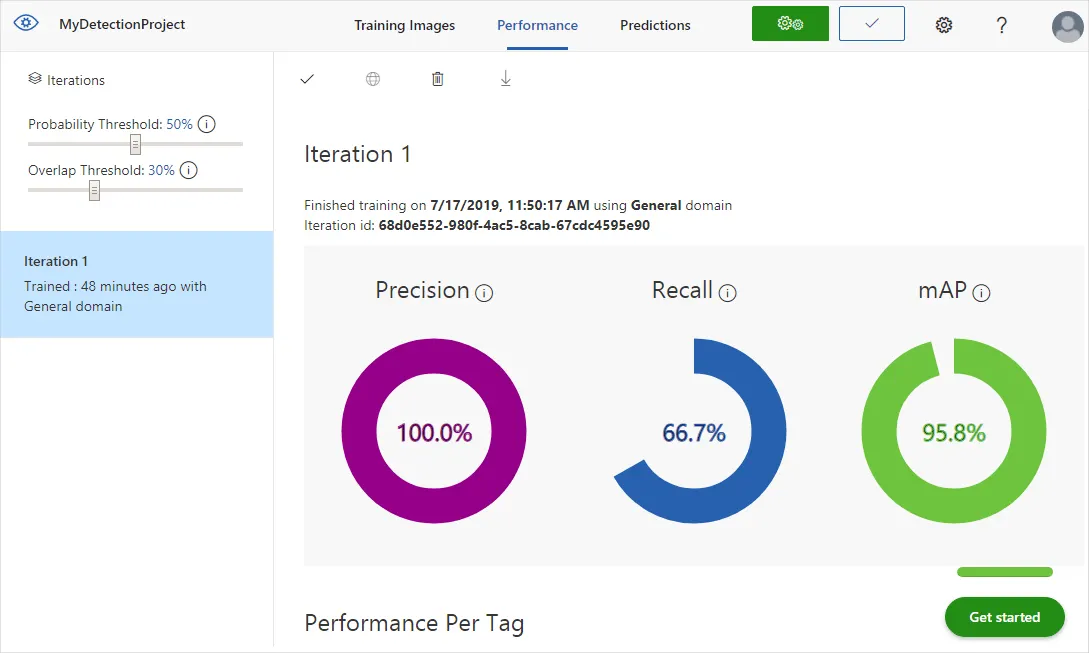
After training has completed, the model’s performance is calculated and displayed. The Custom Vision service uses the images that you submitted for training to calculate precision, recall, and mean average precision. Precision and recall are two different measurements of the effectiveness of a detector:
- Precision indicates the fraction of identified classifications that were correct. For example, if the model identified 100 images as dogs, and 99 of them were actually of dogs, then the precision would be 99%.
- Recall indicates the fraction of actual classifications that were correctly identified. For example, if there were actually 100 images of apples, and the model identified 80 as apples, the recall would be 80%.
- Mean average precision is the average value of the average precision (AP). The AP is the area under the precision/recall curve (precision plotted against recall for each prediction made).
Probability threshold
When you interpret prediction calls with a high probability threshold, they tend to return results with high precision at the expense of recall — the detected classifications are correct, but many remain undetected. A low probability threshold does the opposite — most of the actual classifications are detected, but there are more false positives within that set. With this in mind, you should set the probability threshold according to the specific needs of your project. Later, when you’re receiving prediction results on the client side, you should use the same probability threshold value as you used here.
Overlap threshold
The Overlap Threshold slider deals with how correct an object prediction must be to be considered “correct” in training. It sets the minimum allowed overlap between the predicted object’s bounding box and the actual user-entered bounding box. If the bounding boxes don’t overlap to this degree, the prediction won’t be considered correct.
Manage training iterations
Each time you train your detector, you create a new iteration with its own updated performance metrics. You can view all of your iterations in the left pane of the Performance tab. In the left pane you’ll also find the Delete button, which you can use to delete an iteration if it’s obsolete. When you delete an iteration, you delete any images that are uniquely associated with it.
See Use your model with the prediction API to learn how to access your trained models programmatically.
Pricing
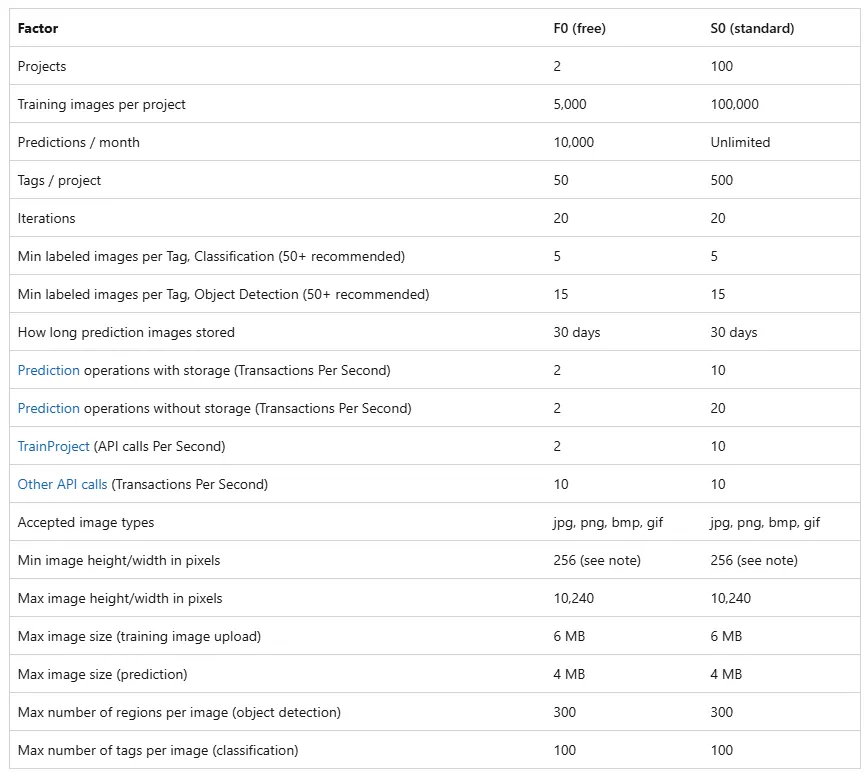
There are two tiers of keys for the Custom Vision service. You can sign up for a F0 (free) or S0 (standard) subscription through the Azure portal. This page outlines the limitations of each tier. See the Azure AI services pricing page for more details on pricing and transactions.
Conclusion
Azure AI Custom Vision is a versatile and powerful tool for anyone looking to integrate image recognition into their applications. With its ease of use, flexibility, and advanced features, it provides a robust solution for a wide range of image recognition needs.
Read More: Visit Medium.com

